
The time has
come to start leaving a tiny bit of wall as a trial to see if it will help
develop sole thickness.
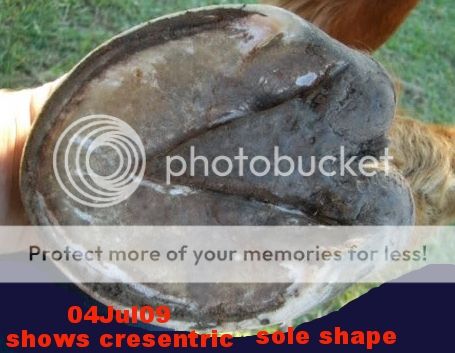
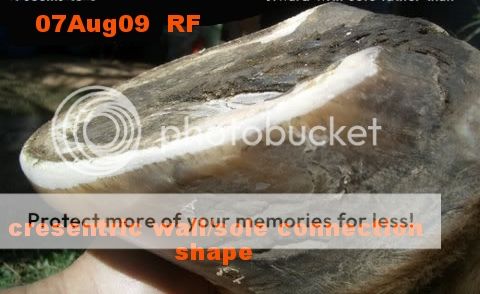
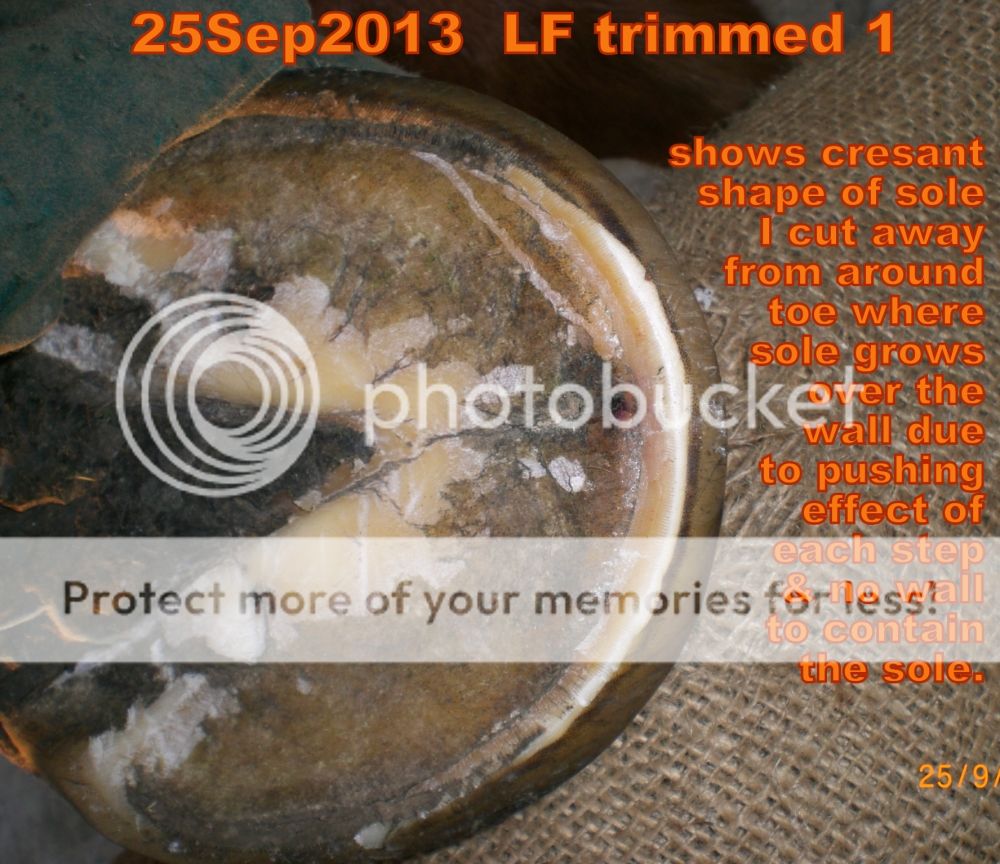
Cresentric Sole Shape
Previously I
have had to take off all the wall thickness plus more around the toe to get rid
of the long toe.
However now
that it seems I have achieved the desired result to steepen the dorsal wall, I
now turn my attention to thickening the sole.
This is how I
see the way the sole thickens:-
The sole is
contained within a boundary created by the wall. As Linda Harris explained it in one her
videos, the sole forms a cresentric shape where it connects to the wall. The
sole pushes up against the wall & because the wall is strong enough &
steep enough, it resists the forward push, instead forcing the wall to buckle a
little where it connects to the wall. That buckling becomes the “Sole Stay”
cresentric shape.
Now with the
benefit of 20/20 hindvision & a very sharp learning J-curve I see I had
several opportunities to correct his feet all those years ago. Unfortunately
without the right information that I was asking for those opportunities were
lost.
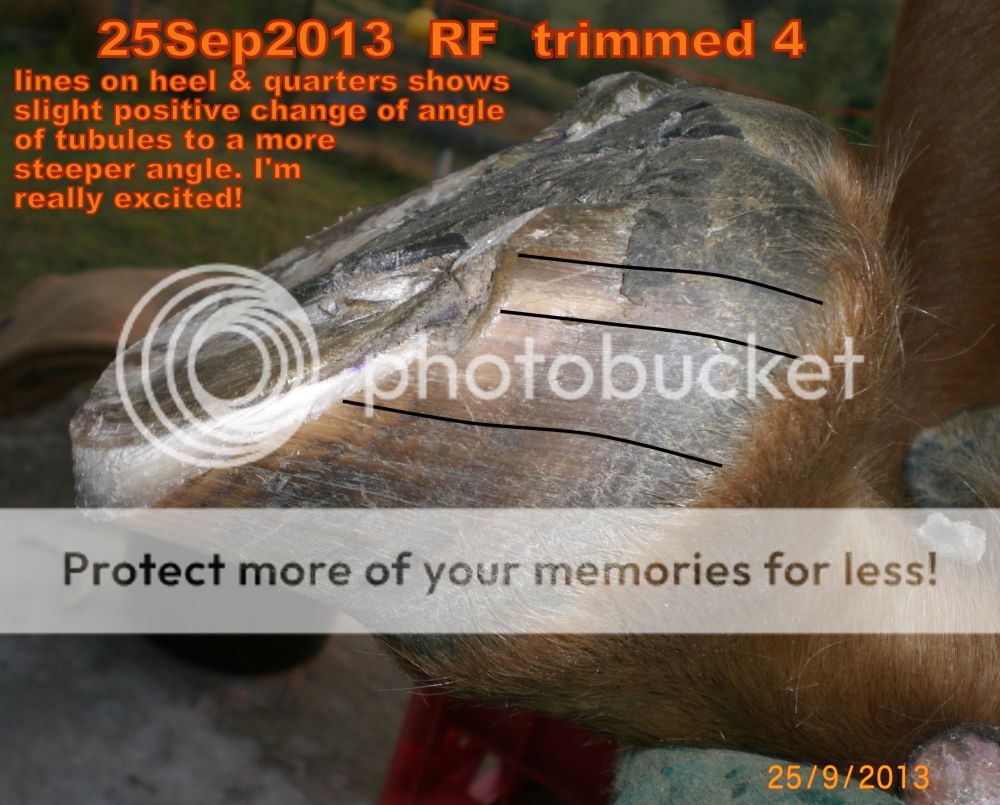
Once the
dorsal wall is steep enough, it can withstand the forward push of the sole &
heels which is driven by every step. The heels still have to join in the
steepening but I can see the tubules are beginning to change direction although
it maynot be all that clear in the latest photos.
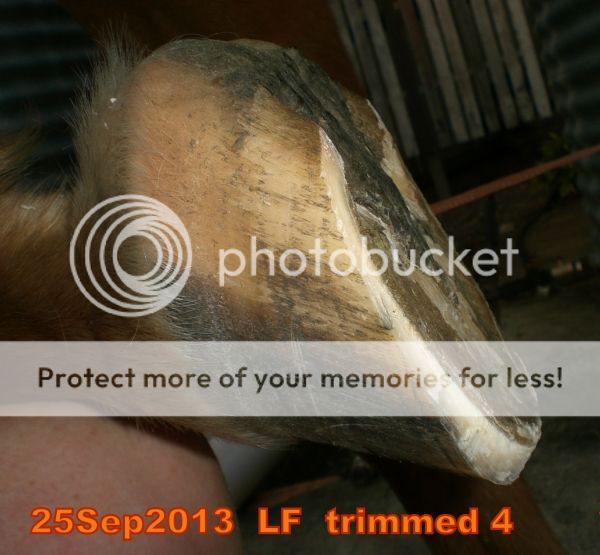
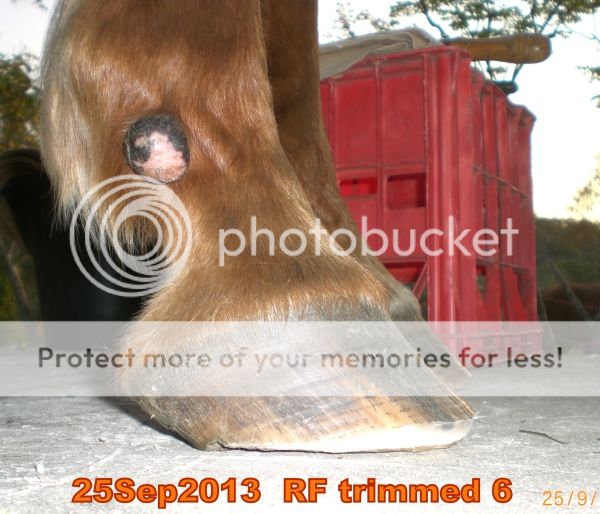
This next photo
shows the slowly changing tubule angles as new grows comes down from the
coronet band.
I’m really
excited about this positive improvement.
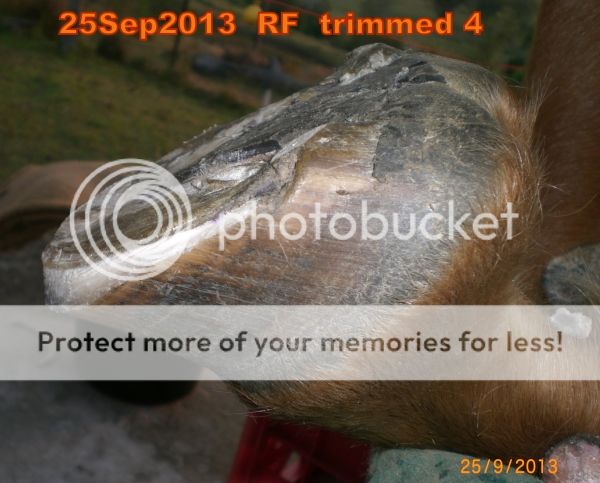
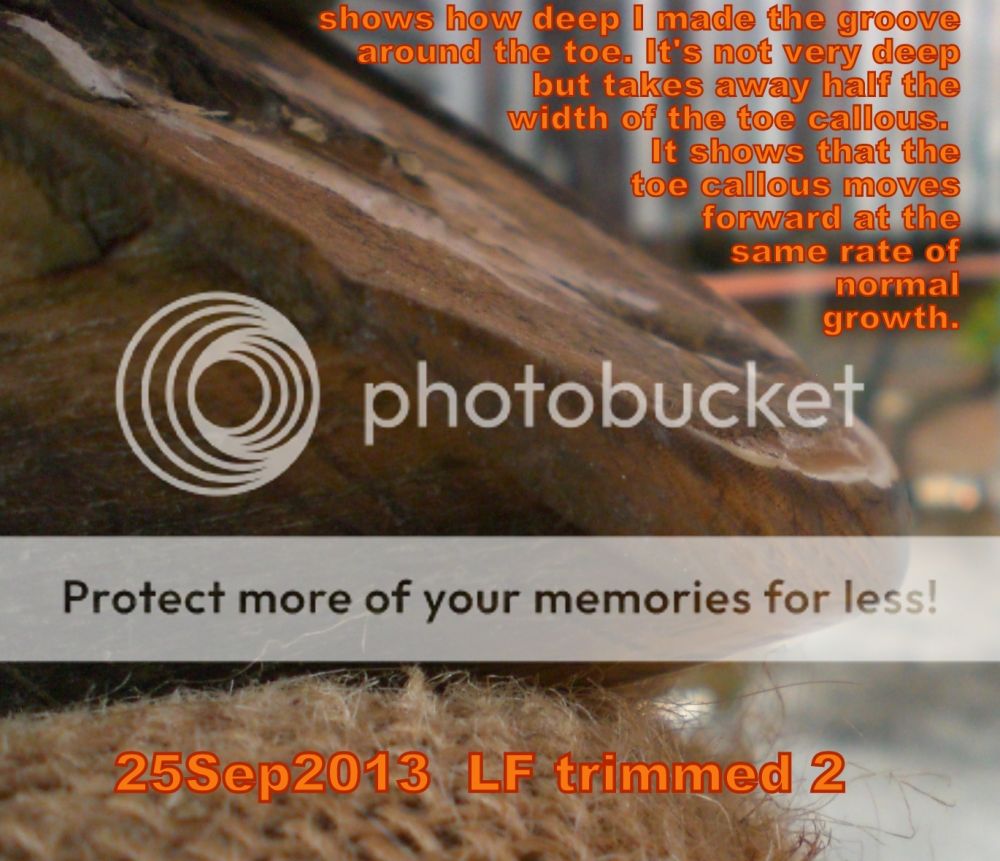
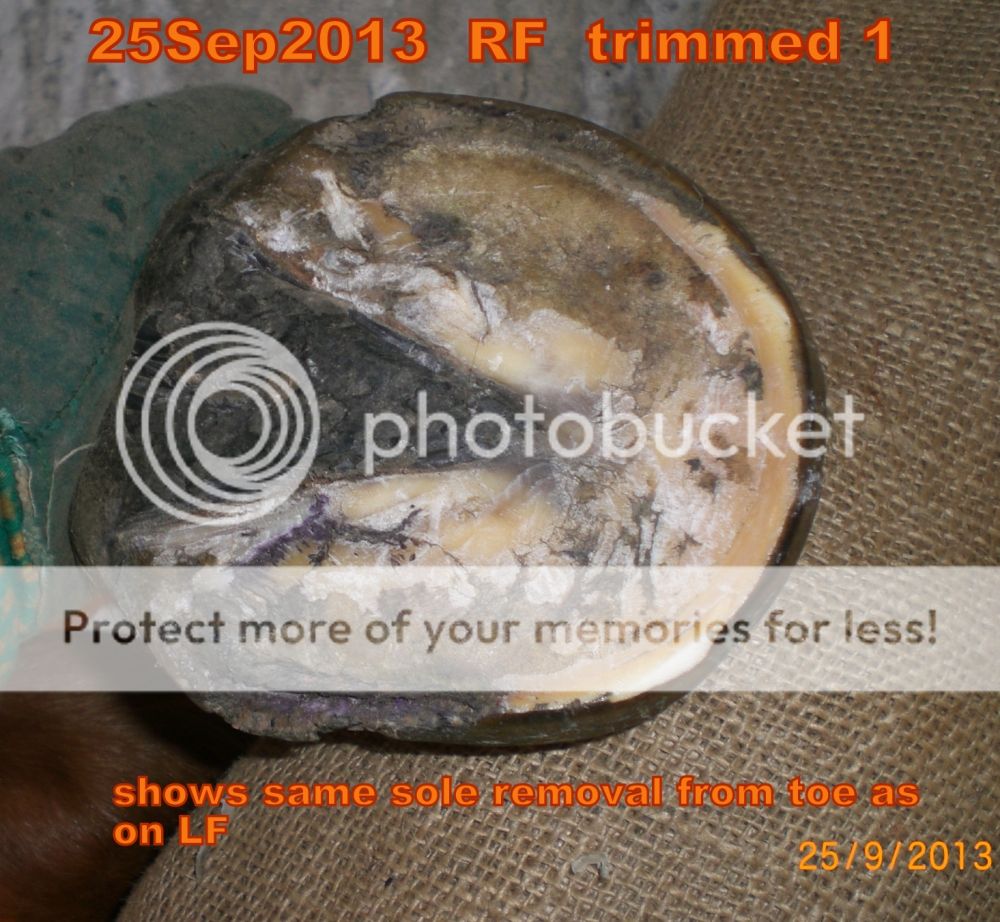
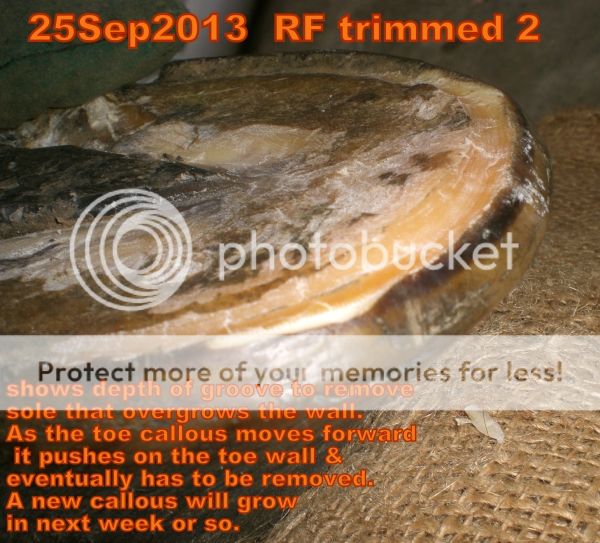
Toe Groove
The other
thing I want to show is how I make the groove around the toe that removes the sole
that grows over the wall which is driven by forward push of sole at every step.
People become confused by this excess sole & think it shows the whiteline
so they don’t want to trim inside it. However it is only excess sole & the
whiteline is way inside that place. This excess sole grows across the lower
surface of the wall when the wall is trimmed back to the level of the sole in
an attempt to stop leverage causing the toe to run forward.
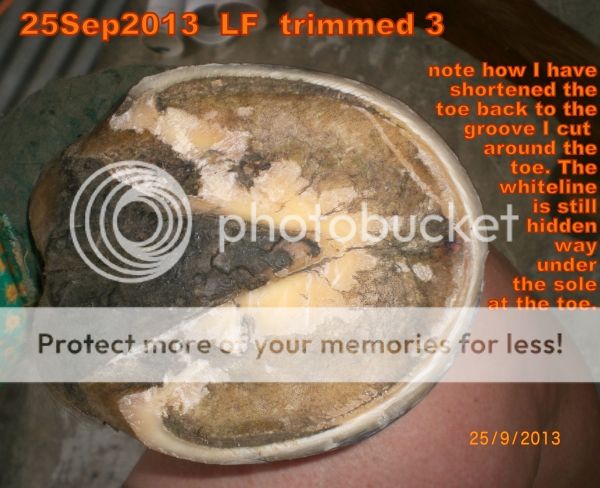
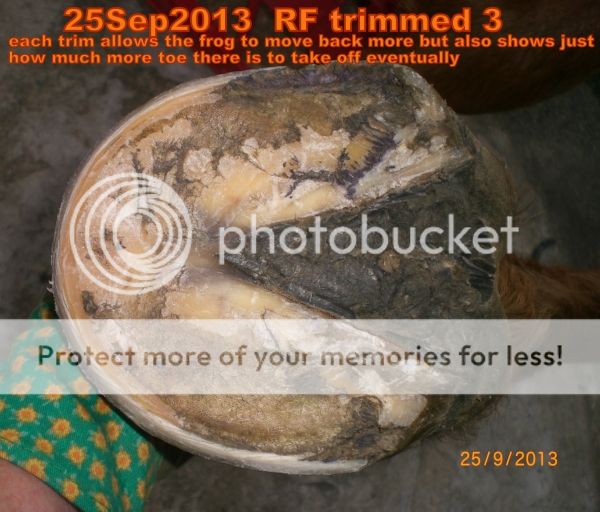
Unfortunately
there is only 1 way to get the long toe off & that is to take it right back
to the proper breakover & keep it there until the dorsal wall grows down
steeper. During that process the sole can escape from under the hoof because
there is no longer any wall to contain it. Because the heels are also run under
as part of the total process of the whole hoof running forward, it applies a
lot of forward pressure to the sole & wall. This forward pressure pushes
sole forward out from under the wall & covers the lower edge of the wall.
So every 2nd trim I have to remove it. Slowly over time with diligence I have
encouraged the dorsal wall to come under control & a new correct angle has
grown down.
Now that the
correct dorsal angle has been achieved I can begin leaving some wall height
again to contain the sole. Only time will tell if it is the right time to start
this next process or if it is premature.

Sonny is
still not standing properly but hopefully his feet are generally heading in the
right direction. He’s still slumping in his forequarters which I take to mean
there is still pain.
See all the
latest photos in this album:-
I’m sorry to
say the “organize” feature does not work in Photobucket anymore (it used to
work really well before they changed the format & updated the software!) so now the
photos no longer stay in the correct order. I hate that. It’s important to be
able to see the pretrim shots in order then the progression through the trim
& also to see all the right fronts & all the left fronts together in
order, not scattered all over the place. }:^/
.
No comments:
Post a Comment